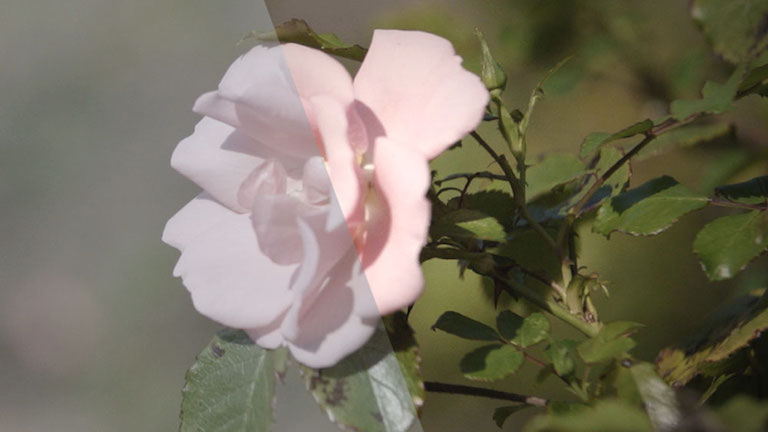
Most are aware of the basic post-production stages a video has to go through before the final delivery, such as editing footage and sound mixing. But in some cases when we bring up ‘colour grading’ with our clients we are met with a faintly perplexed look. Unless you work in video production, other creative industries or you’re an avid hobbyist, chances are your not entirely sure what colour grading actually is. This post will try to explain the basics and why it’s often an important part of video production.
Occasionally when viewing an early edit for evaluation, a client might wonder why the video looks too flat or washed out. A first cut is not usually a good first impression of how the final image will look. So there’s no need to worry at this stage. The likely reason is the video hasn’t yet gone through the colour grading process. Colour grading (or colour timing) essentially means altering and enhancing the shots by changing the colours and tone of the image. It’s an effective way to apply a specific look and mood to the video.
Much like sound mixing, it is usually one of the last processes in the post-production stage. Until an edit is signed off, the video is still subject to re-edits or shots being removed entirely. So colour grading is generally done at the very end to avoid unnecessary work.
The first part of the grading phase is colour-correction. Here the shots are tweaked so they match up in the edit. During filming there are many small factors that can hugely alter the colours of a shot. These can be down to settings on the camera, lenses used or simply changes in lighting. So it’s important these shots are corrected to keep the colours consistent throughout the scene. This is an essential process, even if you don’t want any more drastic changes to the look of the video.
For those wanting a more stylised look to their video, there are a number of options. Perhaps you want a warmer, brighter tint to the image. Or give it a more muted and serious tone. Or maybe you just want it to look like your favourite Instagram filter! All of this is done in the grading process. For more advanced options, its possible to isolate and manipulate details within the scene. For example tweaking the tone of somebody’s skin, or subtly highlighting an object to draw the viewer’s eye.
The technology has evolved drastically over the years. Before the use of computers, a colourist had limited options for altering a look of celluloid film. They relied on years of experience and a lot of faith that everything would turn out as intended. These days the options are many and the results are seen instantly on screen. You want to give the video a steely blue tone? Done. You want that tree to be purple? Why not! Make no mistake, colour grading is still a highly specialised skill. But with versions of pro colouring software like DaVinci Resolve now availably for absolutely free, it’s never been easier to dive in and experiment.
Using colour effectively is a fantastic way to set a tone and enrich the story or message you want to say. When getting a video made, feel free to discuss what options are available in the grade. You can choose to decide on a style beforehand, or maybe sit in on the colouring process itself.
For more info on colour grading or any other process you want explained, don’t hesitate to get in touch.
